Blog: Configuring Azure VNet to enable Remote Desktop Protocol access to your office
With more of us working from home thanks to the current Covid-19 outbreak, I thought it would be helpful to describe how Moriyama can work remotely but still access our machines in the office.
The ideal scenario would not need access to your office PCs at all. However, that’s not always the case for all companies, and even we sometimes need to access a rogue file that’s left on a machine in the office!
For this, I’ve assumed that you use Azure Active Directory for your organisation, as this is what we’re using for authentication.
What is Azure VNet?
Azure VNet or Azure Virtual Network is essentially a Virtual private network that you can attach to your on-premises machines and azure resources - allowing them to communicate with each other securely.
Microsoft Docs does a much better job of explaining this than I, so I suggest you take a moment and have a quick read https://docs.microsoft.com/en-us/azure/virtual-network/virtual-networks-overview while I wait here…
Straight to the point, how do I get started?
Firstly, welcome back! For the sake of brevity, I’m assuming you have your VNet set up in Azure, but if you need to set one up you can view Microsoft's quick guide here: https://docs.microsoft.com/en-us/azure/virtual-network/quick-create-portal
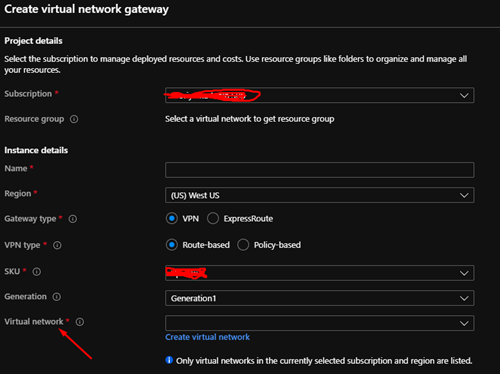
Additionally, you need to create or have already created a Virtual network gateway resource. Creating a gateway resource in this way enables a public endpoint so that you can connect to the VNet remotely. Don’t forget to set the virtual network field to your VNet (as shown in the screenshot below).
Once the gateway has been created head to the gateway resource in Azure and click on "Point-to-site configuration". You will then need to fill out the various options to match your Azure AD settings.
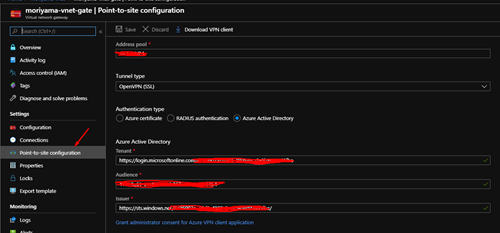
The address pool, for example, should be an acceptable subnet range (CIDR) for the IP addresses assigned to the machines in your office. Ensure this doesn’t collide with the private IP address already being used by your router. Most routers use 192.168.0/24 which allows you to have a range of 192.168.0.0 to 192.168.0.255. If you want to be vague about it you could set something like 10.0.99.0/24.
Every private network is different but you need to make sure your address pool is a private network address space, not public! This page details the acceptable ranges for private networks: https://www.arin.net/reference/research/statistics/address_filters/
For the 'tunnel type' pick OpenVPN (SSL) - picking this allows you to use Active Directory for the authentication type, which in turn allows your clients to authenticate with their workplace Microsoft logins (which includes Multi-Factor Authentication, if enabled).
Next, we need to supply details about the Active Directory. So for tenant grab your tenant id and add it to the end of this URL: https://login.microsoftonline.com/{tenant id}
Then the audience, I recommend opening another tab for this. You will need to authorize the Azure VPN client to be added as an Application to your Azure Active Directory. Please refer to this post to set this up Step 3 Enable Azure AD authentication on the VPN gateway: https://docs.microsoft.com/en-us/azure/vpn-gateway/openvpn-azure-ad-tenant#enable-authentication
Once you have added the Azure VPN client to your Azure AD application. Navigate to it by going to Enterprise Applications and then All applications. You should see it on your list. We need to copy the Application ID. This is your Audience ID.

Finally, we need to set the 'Issuer' this is similar to the 'Tenant', but you need to prefix your tenant id with this URL: https://sts.windows.net/{tenant id}/
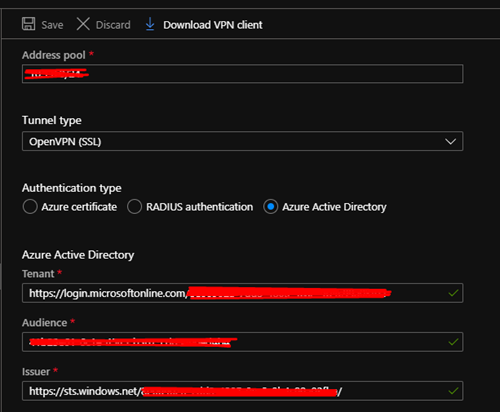
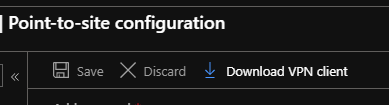
Save your settings and click Download VPN Client.
Installing the client
You now have a zip file containing the configuration for the VPN. Before you unzip it, however, you need to download a VPN client from the Microsoft store called Azure VPN Client.
Unzip the zip file you obtained from Azure and then in the VPN Client click the + in the bottom left and then click Import
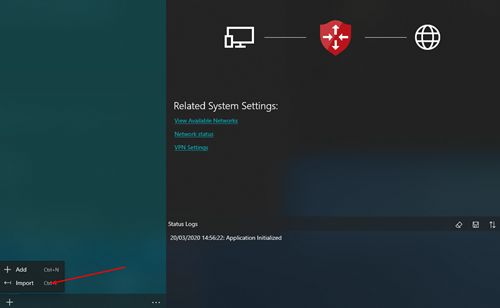
Find your azurevpnconfig.xml file, which is inside the AzureVPN folder:

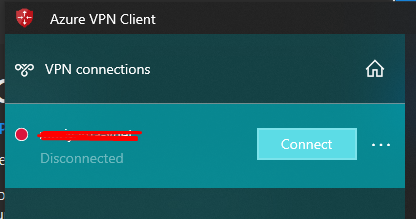
Your VPN connection should now be listed in the app. Click Connect and follow the prompts to sign in with your Azure AD.
Congratulations, you are now connected to your Azure VNet. If everything is set up correctly, you should be able to access any other Azure resources connected to the same VNet.
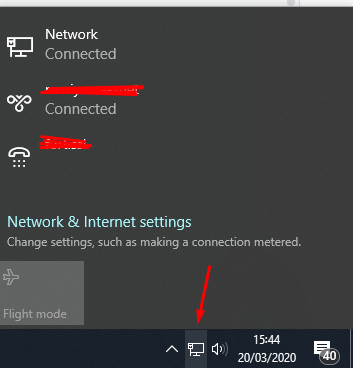
When you need to reconnect to the VNet, you don’t need to open the Azure VPN Client each time. Instead click on the network icon in your taskbar to view your VPN connections, where you can choose to connect or disconnect from the VNet.
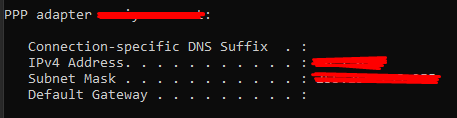
If you run 'ipconfig' in the 'Command Prompt' you can see the assigned local IP address:
Now the magic part to all of this. If you have also set this up on your work PC, then you can communicate between both machines using the private IP address that is assigned. For example, below is me RDPing to my machine in the office.

By default remote desktop access is disabled, however, there are a few posts around on how to enable it: https://www.howtogeek.com/howto/windows-vista/turn-on-remote-desktop-in-windows-vista/
Installing the client remotely
With the current quarantine restrictions, there are only a few ways this could be installed remotely, provided you meet the following criteria.
- At Least one computer in the office has TeamViewer (or any other remote access tool) and you can remotely access it
- All computers already have Remote Desktop Protocol setup as per the ‘howtogeek’ link above.
If you do not meet the following criteria a member of staff will need to head into the office and set up all machines to have Windows Remote Desktop enabled.
Continuing on, once you have remote access to a machine, install the VNet client and log in using Azure AD. Then, in a command prompt, type 'ipconfig' and find your VNet local IP address.
You should now be able to remote into the machine using that local IP address from your host machine. You can then take it further and remote into other peoples workstations from the PC you are already remoted into using their local IP addresses.
There, all done! You now have a global private network running on secure Azure servers at your fingertips. Now go ahead and enjoy your new unbound and remote freedom.