Blog: How to Create a Self Signed Certificate For Your Local IIS Website
When developing websites or APIs that use https on your local machine, you may find that the IIS Development Certificate isn't good enough and you might get an error like this:
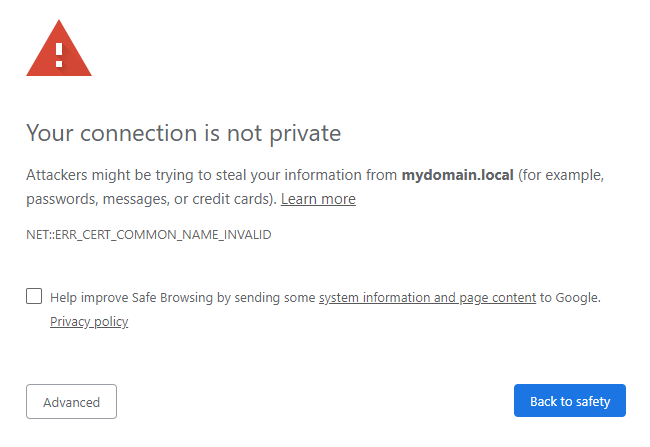
ERR_CERT_COMMON_NAME_INVALID
In some cases - your browser may let you ignore the error - but you'll still be warned while using the site - that the certificate isn't valid:
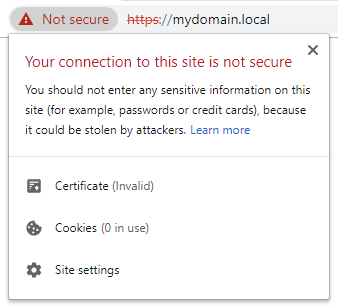
It is generally a good idea to create a self signed certificate for each of your local sites. Modern browsers are becoming more strict on invalid SSL certificates and it is good practice to test your websites with a valid SSL certificate during development.
This blog post will give you step by step instructions and show you just how easy it is to create and use self signed certificates.
Creating the certificate
First, open up Powershell and Run it as an Administrator.
- Windows button
- Type 'Powershell'
- Right click on the app and choose 'Run as Administrator'
Next you want to copy and paste this into powershell but don't hit enter yet:
New-SelfSignedCertificate -DnsName "mydomain.local" -CertStoreLocation "cert:\LocalMachine\My"
Where it says "mydomain.local", update it to be the domain name of the local IIS website and hit enter.
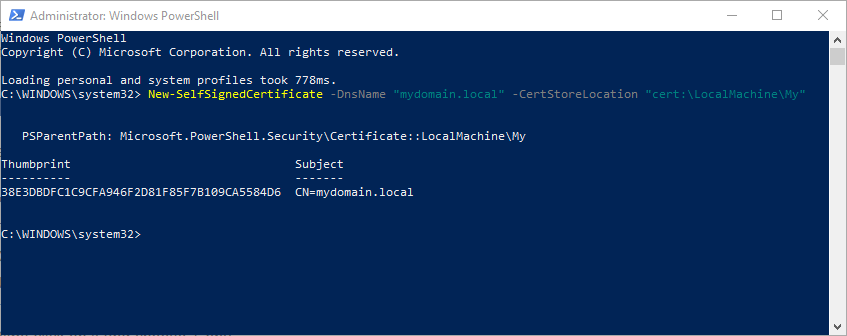
This will create a self signed certificate for you to use, but before you can use it, we need to move it into Trusted Root Certification Authorities Certificates.
Allowing the certificate to be used
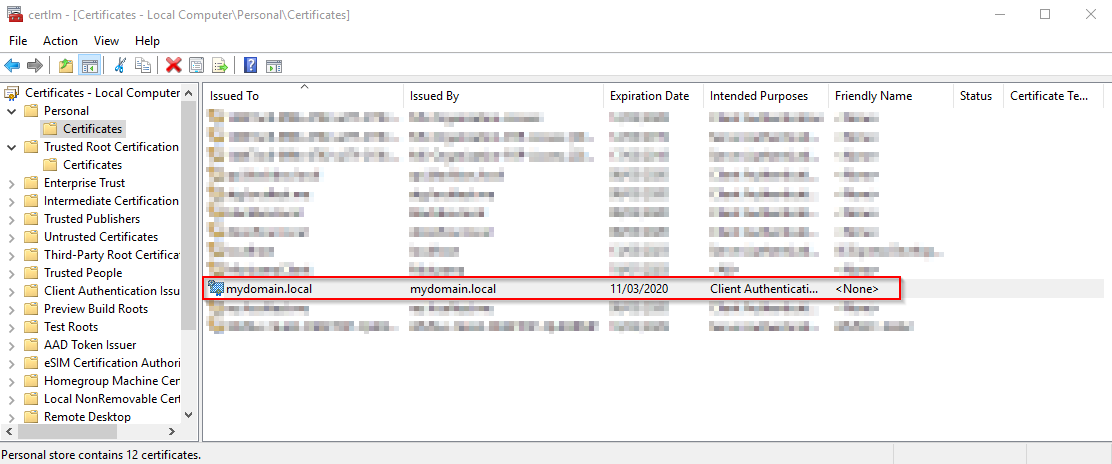
Open up Managed Computer Certificates.
- Press the windows button on your keyboard
- Type 'cert'
- Click on 'Manage Computer Certificates'
- Under Personal, click on the Certificates folder
- Find the certificate you created
- Right click on it and choose 'Copy'
- Then under Trusted Root Certification Authorities right click on the Certificates folder and choose 'Paste'
Using the certificate
Now your certificate will be available for you to pick in IIS.
- Open IIS
- Go to the website you want to add the certificate to.
- Click on Bindings…
- If you don't yet have a binding set up for https, click on Add…
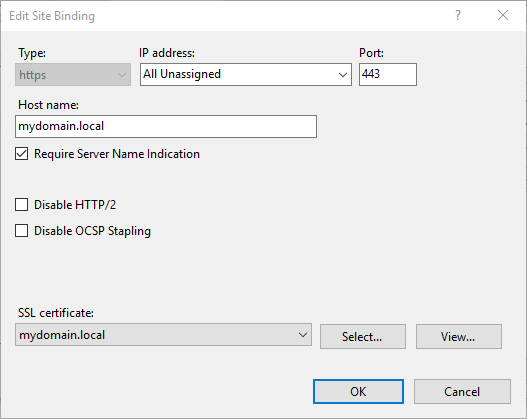
- In the type choose 'https'
- Leave IP address as 'All Unassigned' and Port as '443'
- In the host name, enter the url which you got the certificate for.
- Tick the box which says 'Require Server Name Identification (SNI)
- The in the SSL certificate dropdown you can choose the certificate you created.
- After that, click on OK and you should be all set.
This blog post - By Paul Seal
Our Umbraco knowledge base is available to support customers and contains hundreds of articles similar to this, covering Umbraco, Azure and ASP.NET development - please contact us if you are interested in a support agreement with Moriyama.